

Vitavia Ida 3300 Bruksanvisning
PDF-manual · 36 sider
Nynorsk



Rask sjekk
Incorrect answer, please try again.
Chat med din Vitavia Ida 3300-manual ved hjelp av AI
Få umiddelbare AI-svar fra din Vitavia Ida 3300-manual
Spør hva som helst om Vitavia Ida 3300. Svarene kommer fra denne manualen, med de sidene de er basert på.
Ida 3300 Vedlikeholdsplan
Vask grundigt med et mildt rengøringsmiddel af og til. Sørg for, at rengøringsmidlet ikke reagerer aggressivt med aluminium eller glasfæsteklips.
Rengør øvre og nedre dørskinner regelmæssigt for at undgå ophobning af affald.
Ask a Question
Do you recommend Ida 3300?
Ja NeiFrequently Asked Questions
The base must be exactly square and level. You can use a galvanized steel base (sold as an accessory) or construct a concrete/stone foundation following the manual’s dimensions. Treated timber strips (18 mm high, max 32 mm wide) are recommended between foundation and aluminium frame; fix these with 50 mm bolts. Foundations should extend below frost level.
Er dette svaret nyttig?
Yes. 4 mm twin-wall polycarbonate is an accepted alternative. Ensure the UV-protected side faces outward (marked by protective foil), remove the foil before installation, fit gaskets to profiles, secure panels with glazing clips, and allow space for thermal expansion because panels are cut slightly shorter on purpose.
Er dette svaret nyttig?
Essential tools: flat and PH2 screwdrivers, 10 mm socket or spanner, measuring stick, spirit level, knife, and an accu-drill with adjustable torque. Nuts (1002) should be tightened to a maximum torque of 3 Nm to avoid damage.
Er dette svaret nyttig?
Doors: fit door gliders into the bottom door profile, assemble door rollers and attach to the upper door bar, install brush seals and slide the door into the upper runner; add bolts as door stoppers and adjust for smooth movement. Roof vent: assemble side and top bars per glass thickness, insert glass, bolt the bottom bar, slide window into the ridge rail to position, then fit the window opener and fixers.
Er dette svaret nyttig?
Wear protective gear when handling glass. Clean the greenhouse occasionally with a mild detergent that won’t attack aluminium or clips. Keep upper and lower door tracks clear of debris. Close doors and vents in high winds, remove heavy snow from the roof, and consider heating/supporting in winter. Anchor the greenhouse and consider adding it to home insurance.
Er dette svaret nyttig?
No. The manual notes that wall plugs, screws for fixing to the wall, and drill bits are not included. Some accessories like the galvanized steel base are optional and sold separately; check with your retailer for these items and any region-specific fasteners.
Er dette svaret nyttig?
Fit glazing seals to the aluminium profiles, start glazing the roof from the eaves using glazing spring clips, overlay the next pane over the one beneath and secure retaining clips between panes, and begin side glazing from the bottom. Use washers where the glazing bars join the eaves track and follow the parts diagram for clip placement.
Er dette svaret nyttig?
Advantages and Disadvantages
Advantages

- Space-saving lean-to design ideal for attaching to a house wall, saving garden area
- Rigid aluminium frame offering corrosion resistance and long-term durability
- Supports 4 mm glazing (glass or polycarbonate) with specific instructions for each material
- Integrated roof vent and adjustable sliding door system for good ventilation control
- Comprehensive manual with parts list, diagrams and maintenance/safety guidance
Disadvantages

- Requires a precisely square, level base and careful anchoring to the wall
- Assembly is multi-step and typically needs two people and several tools
- Maximum nut torque limited to 3 Nm—overtightening can cause damage
- Polycarbonate panels need correct orientation (UV side out) and allowance for expansion
- Optional steel base and wall fixings (plugs, screws) often sold separately
Produkt Spesifikasjoner
Glasering
Polykarbonat 4mm (dobbeltveggede plater)
Ramme
Aluminium
Farge
sølv
Areal
3,3m²
Spesialfunksjoner
Takvindu
Dør
Dobbel skyvedør
Dimensjoner (LxBxH)
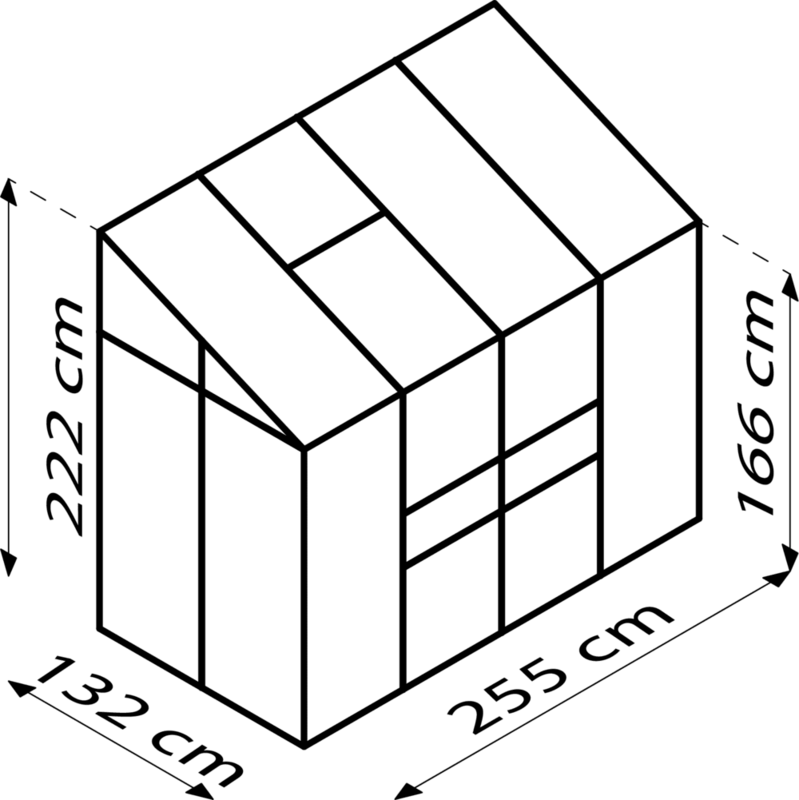
2550x1320x2220mm
Produkt Beskrivelse
Vitavia Ida 3300 HKP 4mm Lean-to Greenhouse alu Manual
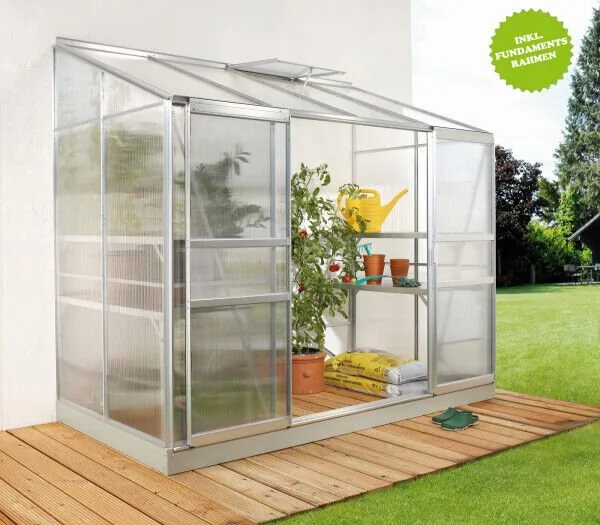
The Vitavia Ida 3300 HKP is a lean-to aluminium greenhouse engineered for hobby and serious gardeners who want a robust, space-efficient growing space attached to a wall. Sized to fit narrow plots and terraces, this model accepts 4 mm glazing (clear glass or twin-wall polycarbonate) and features an aluminium frame, ridge-mounted roof vent, sliding door system, and purpose-made glazing seals and clips. The manual covers site selection, required tools, foundation options, step-by-step assembly, glazing methods, door and roof-vent installation, and maintenance advice.
Assembly begins with a perfectly square, level base—either a prepared concrete/stone foundation or an optional galvanized steel base. The instructions explain aligning and loosely connecting front and side profiles, fitting corner plates, installing sill and ridge profiles, and adding extra bolts in glazing bars intended for the roof vent. Wall-anchoring is detailed: mark predrilled holes, drill 6 mm holes in the wall, insert plugs, and fasten the frame securely (max. nut torque 3 Nm).
Doors are preassembled from profiles, rollers and gliders. The manual stresses not to place assembled doors on the gliders, how to fit gliders and rollers, install brush seals and door stops, and adjust the door for smooth sliding on upper and lower tracks. The roof vent assembly explains choosing the correct side/top bars depending on glazing thickness, squaring the window, sliding it along the ridge rail to the desired position, and attaching the opener and fixers.
Glazing guidance covers both clear glass and polycarbonate. For glass, apply glazing seals to aluminium profiles, start roofing glazing at the eaves, secure panes with spring clips and retaining clips, and fit side panes from the bottom up. For polycarbonate, note the UV-protected side, remove protective film, fit gaskets and clips, and allow for thermal expansion. The manual recommends neutral silicone sealing only if desired, regular cleaning with non-aggressive detergents, and routine clearing of door tracks and roof snow.
Safety and maintenance notes run throughout: always wear protective gear when handling glass and profiles; assemble with two people; anchor the greenhouse; close vents and doors in high winds; clear heavy snow; and include the greenhouse in household insurance. A parts list and exploded diagrams aid identification and spare-part ordering.
Notes:
- Designed primarily for plant cultivation; other uses void responsibility.
- Max recommended nut tightening torque: 3 Nm.
- Optional galvanized steel base recommended for exposed, windy sites.
Pros and cons are listed below to help evaluate suitability.
Search for 67 706 Manuals online


Skriv inn merke eller modell